- apache配置文件为:
/etc/apache2/httpd.conf - OSX下默认集成了apache与php;
- Mac Apache 有2个默认的网站目录,一个是
/Library/WebServer/Documents/,一个是用户目录下的Sites目录(推荐使用),默认未开启; - Apache 基本命令:
1 | 启动:sudo apachectl start |
1. 配置apache
Step 1. 在用户目录下用Finder创建 Sites 文件夹;
Step 2. 在/etc/apache2/users/目录下添加 username.conf文件(username要替换成真正的用户名,下同):
1 | cd /etc/apache2/users |
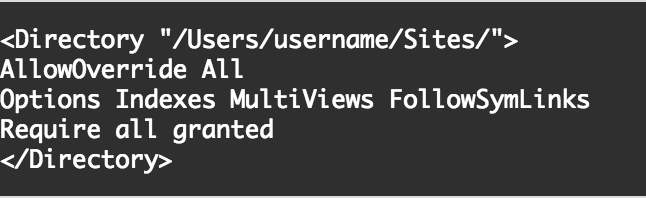
Step 3. 在username.conf文件中添加如下内容:
Step 4. 检查username.conf文件的权限是否正确,正确的应该为:
1 | -rw-r--r-- 1 root wheel 126 Mar 23 23:02 username.conf |
如果不是,则需要修改权限,使用如下命令:
1 | sudo chmod 644 username.conf |
Step 5. 修改httpd.conf文件配置:
1 | sudo vim /etc/apache2/httpd.conf |
在httpd.conf找到如下3行,并确保这3行的注释#是被删除的
1 | LoadModule authz_core_module libexec/apache2/mod_authz_core.so |
接着启用用户目录配置,同为删除对应行的#
1 | Include /private/etc/apache2/extra/httpd-userdir.conf |
Step 6. 修改httpd-userdir.conf文件配置
1 | sudo vim /etc/apache2/extra/httpd-userdir.conf |
取消如下行的#
1 | Include /private/etc/apache2/users/*.conf |
Step 7. 重启Apache,并检查配置是否生效
1 | sudo apachectl restart |
在浏览器输入:http://localhost/~username/,看是否配置成功
Step 8. 让apache支持php脚本
- 修改 httpd.conf 文件配置
1 | sudo vim /etc/apache2/httpd.conf |
- 取消php库文件的#注释
1 | LoadModule php5_module libexec/apache2/libphp5.so |
- 重启Apache
1 | sudo apachectl restart |
- 在Sites目录下创建index.php,内容如下:
1 | phpinfo(); |
- 在浏览器里输入:
http://localhost/~username
如果能显示php环境信息,则说明php环境搭建成功
Step 9. 配置虚拟主机(vhost)
- 将/etc/apache2/httpd.conf文件中如下内容的
#去掉
1 | #Include /private/etc/apache2/extra/httpd-vhosts.conf |
- 修改/etc/apache2/extra/httpd-vhosts.conf:
1 | <VirtualHost *:80> |
2. 修改或创建php.ini
Step 1. 为了开启php的一些扩展功能,有必要对php.ini进行修改。OSX默认提供的php是没有php.ini文件的,因此我们需要自己创建一个。可以在/etc/目录下创建php.ini
- /etc/目录下有提供php.ini.default模板
1 | sudo cp /etc/php.ini.default /etc/php.ini |
如果不知道php默认是到哪里找php.ini文件的话,则使用命令
php --ini:命令输出如下类似信息:
1 | Configuration File (php.ini) Path: /etc |
Step 2. 在php.ini文件最后添加如下内容以启用xdebug扩展:
1 | [xdebug] |
xdebug.remote_host的值建议设置为127.0.0.1,而不要设置为localhost(当开启调试模式时,可能会出现域名解析很慢的问题)
3. 安装并配置PhpStorm
Step 1. 配置php解释器:直接在**Preferences的Languages->PHP**页面添加php命令路径:
1 | /usr/bin/php |
Step 2. 配置debug
在**PHP->Debug->DBGp**中添加如下信息:
1 | IDE key:PhpStorm (与php.ini中xdebug配置项xdebug.idekey一致) |
转载请注明出处:cloudnoter.com